
This week I visited all three Thrift Shops on Grand Cayman. Unfortunately, all three were very small and almost entirely filled with clothing items. It appears the thrift shop in the Cayman Islands is not a very vibrant business (at least, not compared to my experiences in U.S. thrift shops).
But I did not despair. When I first looked over the syllabus for CEP 811, I recognized that I would be doing some “Making.” The mantra of “renew, reuse, recycle” was one our family embraced while living in West Michigan. Although almost no recycling happens here on island (unusual, since one would think people on an island would be mindful of the trash they produce and want to minimize it), I started collecting here in the same way we did in the U.S. Over the past two weeks, I have gathered a fairly wide variety of cardboard, aluminum, tin, styrofoam, cloth, glass as well as many types of plastics in a broad range of shapes and sizes. Here is a photo of my collection midway through the week.

My collection of recycled materials; It’s my own little thrift shop!
So it is with these materials (and my littleBits kits) that I began my Maker odyssey.
Following a couple days of playing (mostly fun) and experimentation (frequently frustrating), I settled on making a motorized shadow puppet theater a la “Home Alone.”
Motorized Shadow Puppet Theater Instructions
Using nine parts from a littleBits kit and some basic materials found around the house, I created a motorized shadow puppet theater similar (though on a much smaller scale) to the one my ingenious namesake, Kevin, built in the 1990 comedy “Home Alone.” This project was inspired by discussions with elementary science teachers about technology projects involving light and shadow. Elementary lessons on pulleys or art also came to mind when considering this project.

Materials:
littleBits
1 – 9v battery/battery cable/power adapter (a1, a2, & p1 from littleBits kit)
1 – rgb led (o3 from littleBits kit)
2 – long led (o2 from littleBits kit)
1 – dc motor (o5 from littleBits kit)
1 – branch (w2 from littleBits kit)
3 – wire (w1 from littleBits kit)
1 – plastic screwdriver
Household
1 – piece of cardboard (11” x 15”)
1 – cardboard box top (11” x 15” x 2”) (Much like the top of a Banker’s Box)
1 – tin can (3.25” diameter) (I used an empty tuna can.)
2 – plastic lids (3.5” diameter) (I used screw tops from Talenti Gelato. Mmmm, delicious!)
1 – plastic container (3.625” bottom diameter/3.875” top opening diameter) (I used an empty Tribe Hummus container. Also, yummy!)
(The exact diameters of the can, lids and container are less important than their relative sizes. The lids should be slightly larger than the can and slightly smaller than the container.)
1 – Philadelphia Cream Cheese box (or other card stock weight material of similar size such as 3×5 cards)
1 – sheet letter size paper
3 – sheet wax paper (10” x 14”)
2 – thumb tacks
1 – nail (2.5”)
4 – small washers
Sticky Tack
Tape
Scissors
Craft knife
Hammer
Stapler
Step 1:
Assemble the littleBits according to the following: (click on any photo to enlarge)
 a.) Connect the 9v battery/battery cable/power adapter (a1, a2, & p1) combo to the branch (w2). LittleBits are designed to magnetically connect only in the correct orientation regarding input/output paths. So, if a Bit doesn’t connect when trying one side, simply flip around to the other side to connect it.
 b.) Combine the 2 long leds (o2) with a wire (w1) to the rgb led (use the littleBits screwdriver to set the rgb led to full brightness on all three channels). Then add this “light unit” to the branch (w2).

c.) Using 2 wires (w1) connect the dc motor (o5) to the branch (w2).
 Tape the 2 long leds together, and then tape the rgb led to the bottom of the long led pair
  keeping all three lights aligned as best as possible. When all three lights are properly aligned, the light will cast a more coherent shadow, making for a better shadow puppet experience.
Step 2:
Prepare to build the base and the motorized pulley system:
a.) Orient the piece of cardboard with the short side closest.
b.) Using the nail, punch a hole in the cardboard approximately 2 inches from the bottom and 2 inches from the right hand side.
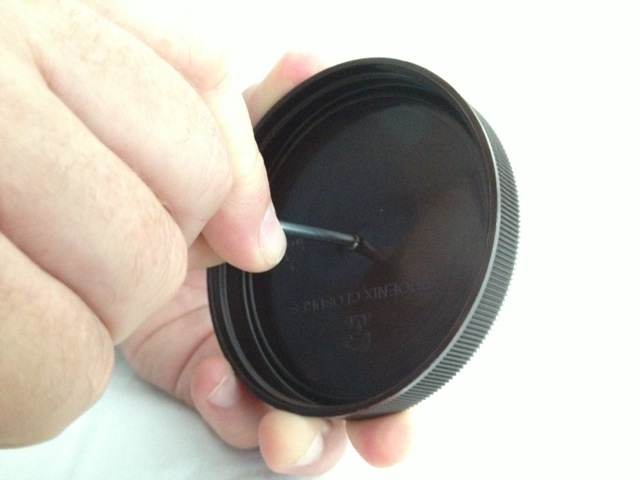
c.) Again using the nail, punch holes in the center of the tin can and in the center of one of the plastic lids. The hammer will be helpful for creating the hole in the tin can. Use the nail as a makeshift drill bit to bore a hole in the plastic lid.
 d.) Lastly, use the nail to bore a hole in the center of the plastic container. This hole should be small enough that the d-spindle of the DC motor will fit tightly in it.
Step 3:
Assemble the base and the motorized pulley system:
 a.) Inserting the nail up through the bottom of the cardboard, place the plastic lid onto the nail (oriented the same as when it is being used as a lid), followed by the washers (to be used as spacers), and topped off with the tin can (also in a right-side up orientation).
 b.) Place the other plastic lid parallel to the first lid but located on the left side of the cardboard base. Do nothing to attach it at this point. Its final position will be set in a later step.
 c.) With the DC motor and wire attached to the rest of the littleBits assembly, center the d-spindle with the center of the left side plastic lid, and use some Sticky Tack to mount the motorized pulley to the left side plastic lid, d-spindle pointing up. (Note: orient the DC motor littleBit parallel to the short side of the base. This will be important later when the “rope” is attached to the pulley and pulls the unit toward the tin can pulley.)
 d.) Use a small piece of tape to secure the wire to the side of the plastic lid and keep it out of the way.
 e.) Stick two thumb tacks at 2 o’clock and 4 o’clock just right of the lid where the motorized pulley will be mounted. These will prevent the lid from sliding toward the right side pulley. They also allow for some flexibility in position later when the “rope” is added to the pulley.
 f.) Place the inverted plastic container centered over the DC motor and push down until the d-spindle just penetrates the hole.
Step 4:
Build the “rope” and shadow puppets for the motorized pulley system:
a.) Cut three 1 inch by 11 inch strips from the letter sized paper.
 b.) Cut two “puppets” out of the card stock (cream cheese box for me). I chose to cut out a male and a female puppet. Other potential choices are animals or several flame shapes to create a shadow fireplace.
 c.) Attach the paper strips in a straight line using pieces of tape and overlapping approximately 1 inch at each join. Keeping the strips straight is important for keeping the pulley functioning properly. (I taped mine together while they were lined up along the straight edge of a counter.) Flip the strip and tape the joins on the reverse side as well.
 d.) Use the long strip to measure the distance around the two pulleys. Adjust the length of the strip so that only about two inches overlap. Cut the strip and tape the ends together to create a single loop.
 e.) Attach the shadow puppets to the strip with tape. Add a slight bend to the puppets to make their trip around the pulleys easier.
Step 5:
Build and test the screen:
 a.) Measure and cut an opening in the cardboard box top leaving approximately 2 inches of border around the edges.
 b.) Attach the 3 sheets of wax paper to the inside of the box top opening with tape. Using 3 sheets creates a perfect translucent screen.
c.) Place the screen at the front (pulley end) of the base.
d.) Switch on the power and adjust the position of the lights by bending the wires that hold the leds. Likewise, adjust the position of the leds by moving the light unit closer to or farther from the screen.
e.) Have fun playing. Experiment with other shadow puppet shapes and positions on the “rope.”
Project Steps Summary
- Gather materials
- Assemble littleBits light and motion unit
- Prepare parts for construction
- Assemble base and motorized pulley system
- Build “rope” and shadow puppets
- Build screen
- Assemble, experiment and play
Closing Thoughts
One of the biggest challenges of this project is determining how tight to make the paper strip “rope” on the pulleys. Too tight and it tends to work its way off. Too loose and there is not enough friction with the pulleys to move the shadow puppets around. Play with this tension to find the sweet spot.
Beyond the optics, light and shadow discussions and exploration generated by this project, the multiple circuits of the littleBits assembly as well as the basic physics of the pulley system offer a broad variety of science topics accessible to elementary investigators.
See the final product in action here.

It sounds like you had a fun and delicious time with this assignment. This is such a cool idea for your maker kit. After reading through your blog, I was disappointed to see that there was no video at the bottom. Then I read the last sentence and was overwhelmed with joy. I am going to watch it right now.
Pingback: Maker Experiment #1 | Just Another Day in Technology…
Pingback: On Making, McGyver and McLuhan (sort of) | Just Another Day in Technology…